


A firewall in Windows protects your computer from undesirable network traffic, whether incoming or outgoing.
As such, it is recommended you should always leave it turned on. Anyway, it’s turned on by default in Windows.
But sometimes you may have installed a better firewall option and want to turn off the one that comes with Windows 10.
Running two sets of firewalls isn’t recommended, so it would be wise to disable Windows firewall until you need it at a later time.
Here are the steps on how to turn off firewall in Windows.
You may also follow them to disable Windows firewall permanently in Windows 10.
Contents
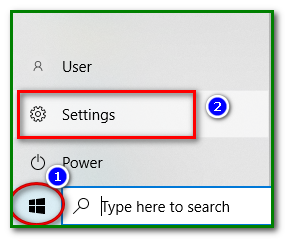
Step 1 – Go to Windows Settings
Do this by typing Settings in Windows Search or click the Windows icon.
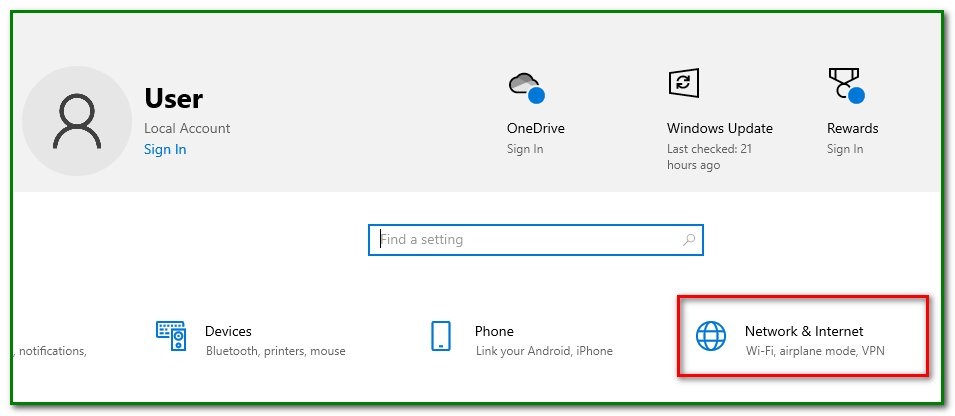
Step 2 – Select Network and Internet
On the Settings page, select Network & Internet.
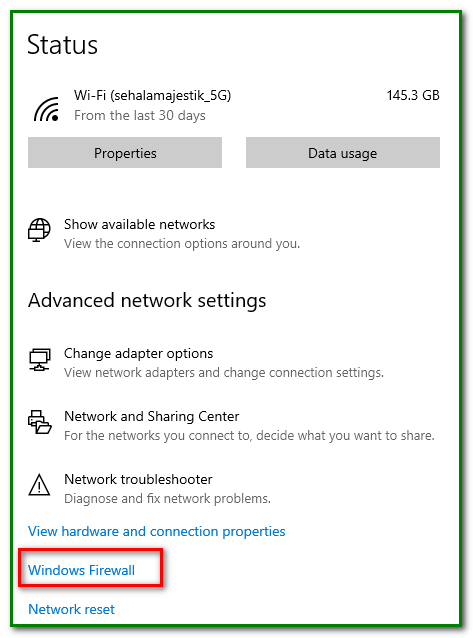
Step 3 – Scroll Down to Windows Firewall
You’ll find this at the bottom of the Network status panel.
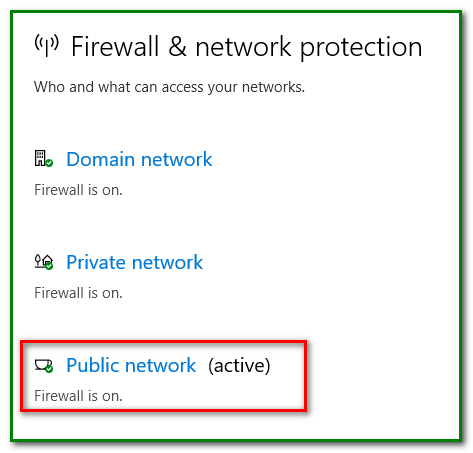
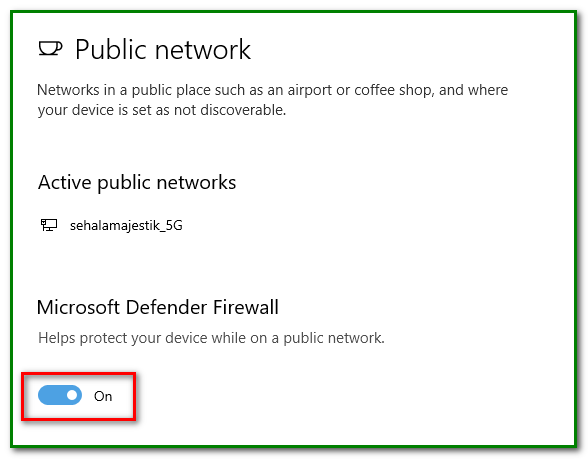
Step 4 – Select Your Network
Under Firewall & Network Protection, click on your preferred network.
Step 5 – Toggle the On Button
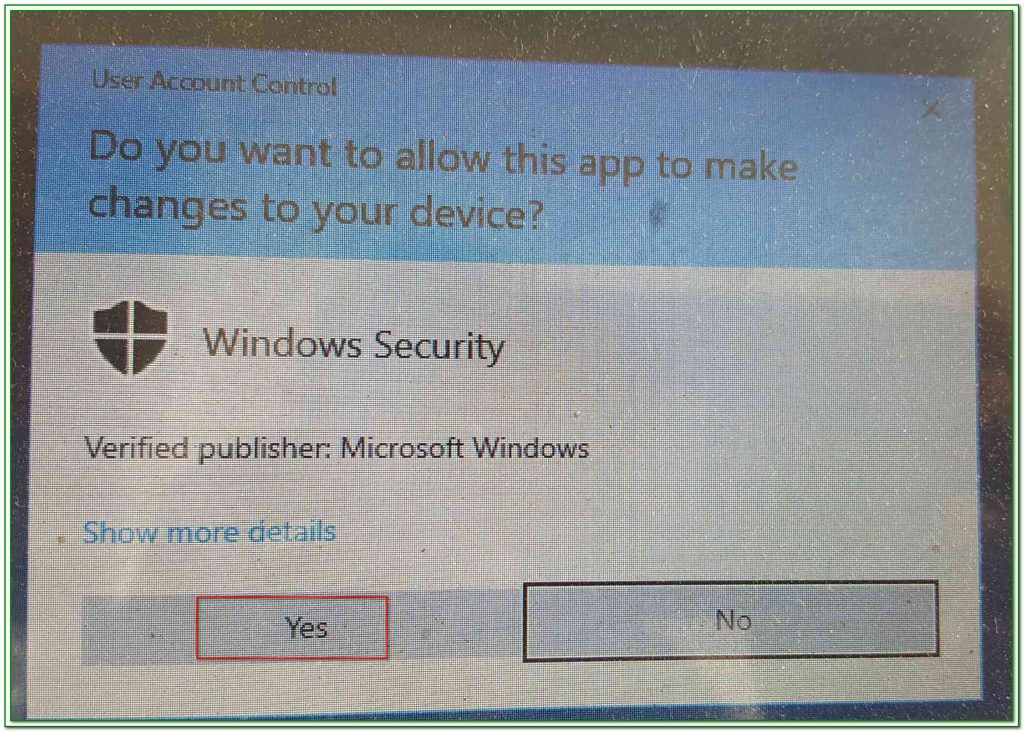
Step 5 – Confirm Turn Off Firewall
You’ll be asked to confirm whether you want to disable firewall.
Click Yes.
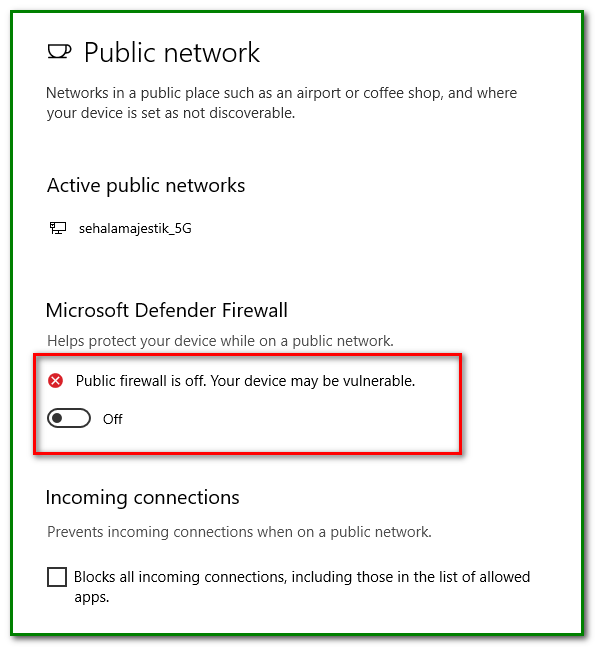
The moment you turn off firewall, you’ll receive a warning.
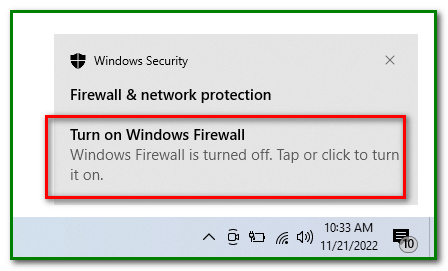
You’ll also receive a reminder at the bottom right of your computer.
You may proceed to turn on your Firewall should you change your mind later by following the steps above.
Those were the steps on how to turn off firewall in Windows.
Now, go ahead and give the steps a try.